What kerf means
Kerf is the width of material removed as the laser makes a cut. It affects the dimensions of the finished part, especially when a drawing has narrow slots, small holes or close-fitting features.
There is no single kerf value for every fiber laser. The measured cut depends on the machine, laser source, optics, material and thickness, nozzle setup, assist gas, focus and cutting recipe. Treat any example value as specific to its stated conditions.
What can change the cut width
A wider or inconsistent cut can come from several conditions acting together. Check the whole process instead of changing the focus alone.
- Beam delivery and optical condition, including contamination, damage or incorrect installation.
- Material type, thickness, surface condition and reflectivity.
- Nozzle type, opening, condition, centering and distance from the sheet.
- Assist-gas type, pressure and stable flow, set according to the machine and process chart.
- Cutting speed, laser settings and the focus position selected for that material and thickness.
How cutting speed affects the result
If the process is too slow, excess heat can widen the kerf, increase discoloration or roughness, and create more burr. If it is too fast, the beam may not cut through consistently and the underside may show dross or uncut sections.
The goal is a stable process window, not the highest possible speed. Compare the top and bottom edges of a test coupon and follow the approved cutting chart for the exact material and thickness.
Why focus position matters
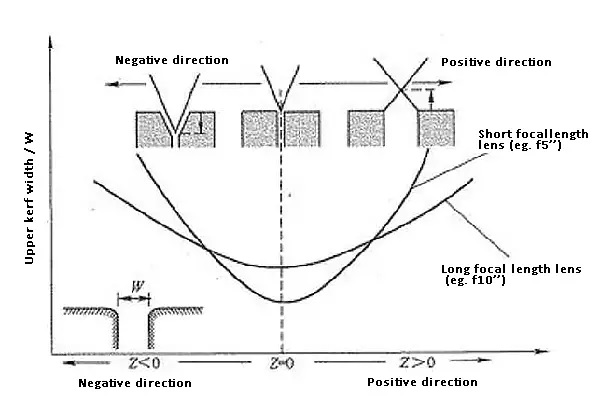
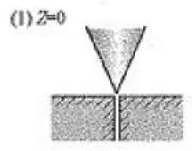
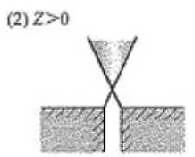
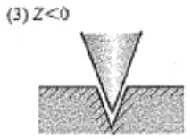
Focus changes the beam size and energy distribution through the material. Moving it can change the kerf width, taper, edge quality and the way assist gas clears molten material. The best setting depends on the machine, head, lens configuration and cutting task.
Do not assume that focus must always be at the surface or always above or below it. Use the machine maker’s recipe as the starting point, then confirm with a controlled test cut.
A practical check when the kerf seems too wide
Use this sequence to narrow down the cause without making several changes at once:
- Confirm the selected material, thickness and cutting recipe match the actual sheet.
- Inspect the cut on both sides. Note width, taper, roughness, burr and whether the cut is fully through.
- With the machine made safe, check the nozzle for damage, deposits, looseness and centering.
- Check gas supply, pressure and flow against the machine maker’s instructions; look for leaks or unstable supply.
- Have a qualified operator verify focus and height calibration using the approved procedure.
- If the problem remains, arrange inspection of the protective optics, beam path and cutting head by trained service personnel.
Tune the process one step at a time
Make a small test cut on the same material and thickness as the production job. Change one approved setting at a time, record the value and compare repeated samples. This makes it easier to identify which change improved the edge and keeps a usable process record.
Measure the kerf with a suitable measuring tool and compare it with the drawing tolerance. A visually narrow cut is not automatically accurate if the part dimensions or edge quality are outside specification.
Maintenance and laser safety
Before inspecting the cutting head or changing a nozzle, stop the machine and follow its isolation and safety procedure. Never look into a laser path or open the laser head while the system is enabled. Optical cleaning, alignment and internal service should follow the relevant manufacturer instructions and be handled by trained personnel.
A persistent change in kerf can indicate a process issue or a component that needs service. Record the material, thickness, recipe, cut appearance and any recent maintenance so a technician can diagnose it efficiently.