What nozzle centering does
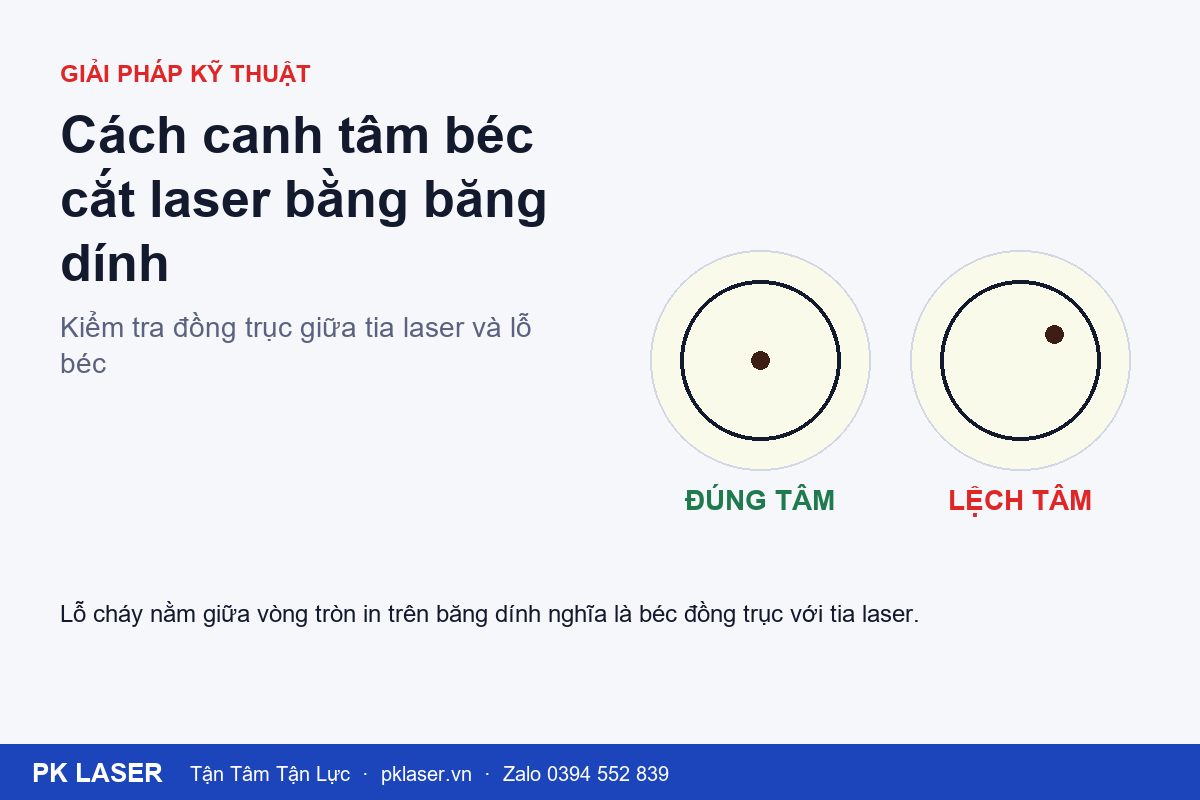
Nozzle centering, or coaxial alignment, adjusts the beam so it passes through the center of the nozzle opening. It affects cut quality. Recheck alignment after replacing the nozzle or ceramic ring, or after the cutting head has collided with something.
Signs that the nozzle may be off-center
- The cut looks clean in one direction but has more dross or burrs in the opposite direction.
- A round hole looks distorted or one side of the cut edge is rougher.
- The nozzle gets unusually hot or is scorched on one side.
- The protective lens gets dirty or burns faster than before.
What you need
- Thin transparent tape.
- Laser safety glasses rated for the fiber-laser wavelength.
- The centering-screw tool for the cutting-head model.
- A nozzle in good condition, with a round, undamaged opening. Replace a damaged nozzle before centering.
Five steps to center the nozzle with tape
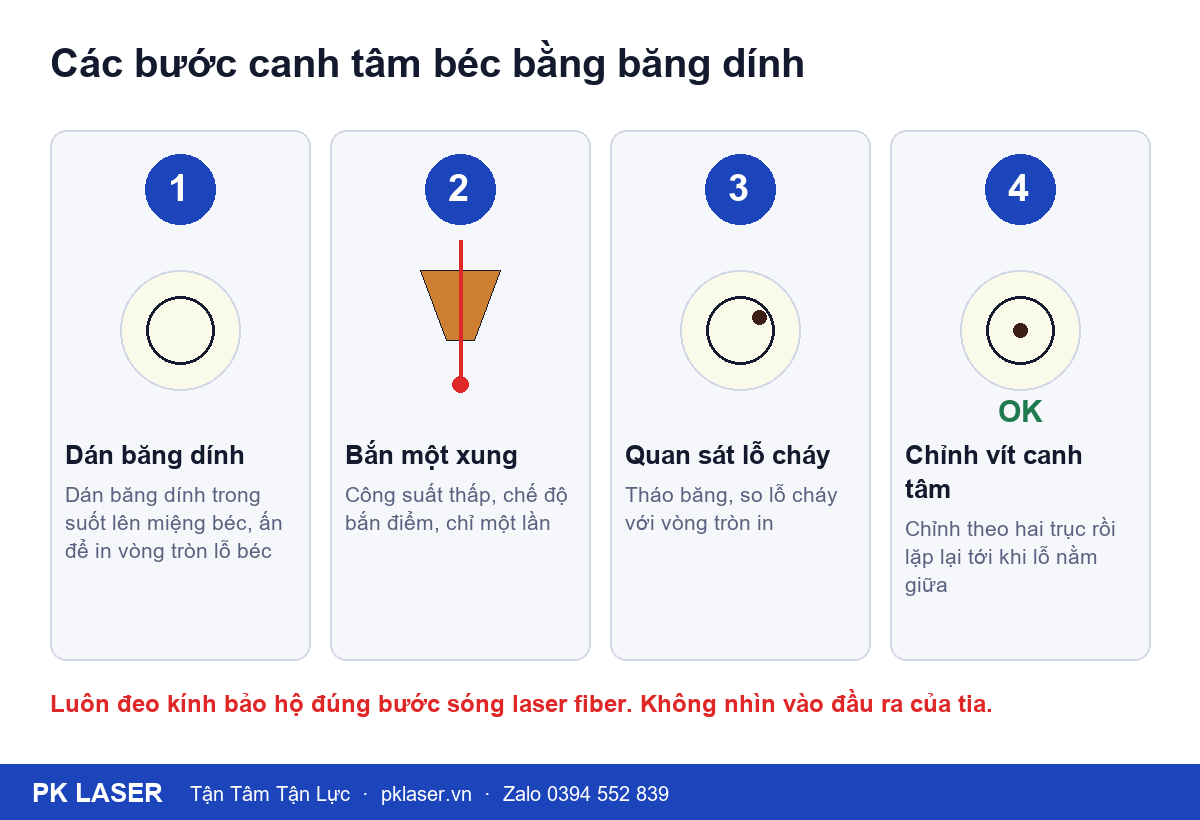
1. Place tape over the nozzle opening
Apply a flat piece of tape over the nozzle tip. Press it gently around the edge so the nozzle opening leaves a clear circle on the tape.
2. Fire one low-power pulse
In the control software, select point-pulse mode and use low power with a short duration, following the machine manufacturer's instructions. Fire once to make a small hole in the tape.
3. Check where the hole appears
Remove the tape and compare the burn hole with the printed circle. A hole in the middle indicates that the nozzle is centered. If it is off to one side, the beam is displaced in that direction.
4. Adjust the centering screws and repeat
Use the two centering screws on the cutting head to move the beam along the two axes, making small adjustments each time. Apply fresh tape and repeat steps 2 and 3 until the burn hole is centered.
5. Recalibrate the sensor and make a test cut
Many systems require capacitance recalibration so the height sensor reads correctly. Then cut a test part with edges in several directions and check that the cut is even.
Safety
Always wear safety glasses rated for the laser wavelength during the test pulse. Never look into the beam outlet or place a hand under the nozzle while the machine could emit a beam. Turn off laser emission and shut off the gas before removing or installing the nozzle or ceramic ring.
Common mistakes
- Using too much power makes the burn hole too large to judge accurately.
- Wrinkled tape makes the printed circle unclear and can lead to a wrong reading.
- A dented nozzle has an uneven opening, so its true center cannot be identified reliably.
- Forgetting sensor recalibration can leave the height reading unstable.
Need PK LASER support?
Send a video of the burn mark on the tape or of the uneven cut, and PK LASER can guide you through the adjustment. Message Zalo: 0394 552 839. Call technical support: 0394 542 839.