1. Leapfrog travel between contours
During non-cutting travel, a supported controller may combine lift, traverse and lower movements to reduce idle time. Use the programmed clearance and collision-avoidance settings for the actual machine; the feature does not replace safe setup.
2. Automatic focus
An autofocus system adjusts the optical focus according to a selected process recipe. Focus position is different from nozzle-to-sheet height. Confirm calibration and use the settings approved for the material, thickness, head and cutting method.
3. Automatic edge finding
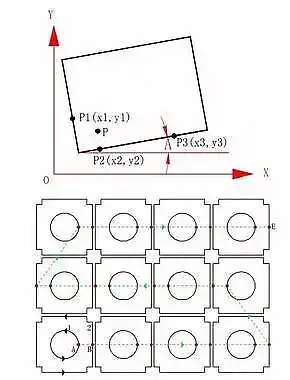
Edge sensing can estimate a sheet’s position or angle so the cutting path aligns with the loaded workpiece. It works only when the machine, controller and sensor support the routine; load and secure the sheet as the maker specifies.
4. Concentrated or staged piercing
Some workflows pierce several contours before cutting them. The pause between piercing and contour cutting can help manage heat in suitable jobs, but it also changes cycle time and must follow the machine’s approved process settings.
5. Micro-joints for small parts
Small uncut tabs can keep parts attached to the sheet during cutting and reduce the chance that a part shifts. Their placement and size affect edge quality, removal and downstream finishing, so use the nesting software’s supported method.
6. Shared-edge cutting
When compatible parts share a boundary, a controller may cut that boundary once. This can reduce tool path length, but layout, heat, part stability and scrap removal must be considered before using it.
Check compatibility before enabling a feature
Names and behavior vary by controller and software version. Check the manual, verify that the machine supports the function, and test with an approved program and material while monitoring cut quality, collisions and part stability.